Supplies:
~Tissue Paper
~Wire (or string works fine)
~scissors
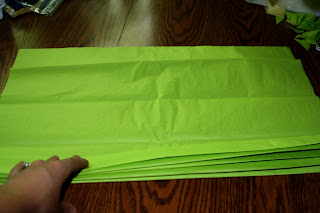
First, lay your tissue paper flat. I like to have around 4 layers of tissue.
Fold your paper like a fan..back and forth approximately 1" wide.
When you have it all folded it should look like this.
Cut the two ends off so they make a point.
 Next you need to pinch the middle (as shown) and wrap a piece of wire around it. I don't like to wrap the wire too snug..if you wrap the wire just slightly loose it will make the next step much easier.
Fan out and spread the tissue paper.
Take the first layer and separate it from the other layers as shown.

Continue separating each layer as shown...
..and your pom should look like this. Now fan out and spread the layers on the other end of the pom.
I like to add a small piece of tape to the middle and pinch the 2 inner linings together so you can't see the middle part where the wire is (even though it's probably not necessary).
TaDa!! Your pom is done!! Woot!
Once you get the hang of it they are so fast and easy!
Here is how my photo background turned out!! Not bad for only having a day to come up with it!
What's so funny??!!
Ha! To make the party even more fun we had a craft activity where we had to make a funny prop to wear in the picture! I made glasses from pipe cleaners and an adorable mustache from construction paper.
Yea, you should be jealous.


No comments:
Post a Comment